Right well now that the film is finished I feel I can share some of the techniques we used in the VFX process.
There was a hell of a lot of VFX in this short which is why it took so much time to complete. Although I can’t say that any of the effects were of amazing quality I am still proud of how it all came together.
One of the more time consuming effects was the eye replacement for both Ludwik and Katie. I did toy with the idea of using 3D eyeballs to create the whited out look but decided to try a much simpler approach which worked surprisingly well.
The technique was to use 2D imagery tracked onto their faces.
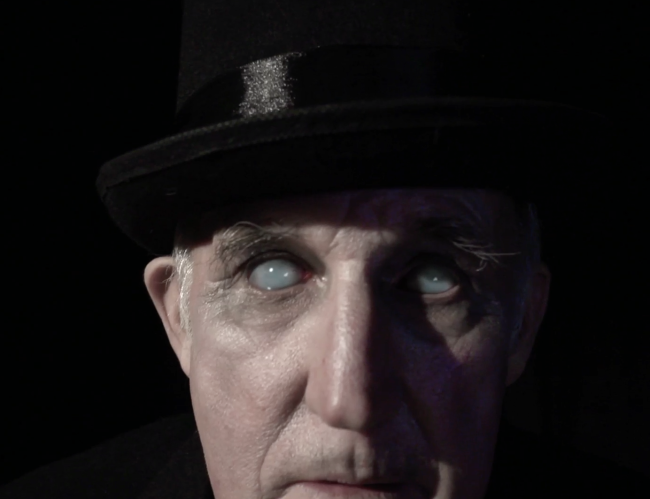
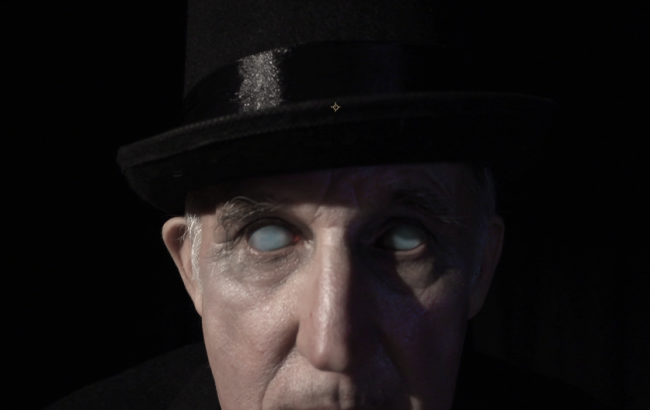
Here is a close up of one the more complex eye replacements.
Now I’m going to try and keep the techniques to how to achieve this as simple as possible but if you want a more in depth tutorial video co-pilot have got a great tutorial here http://www.videocopilot.net/tutorial/eye_replacement/
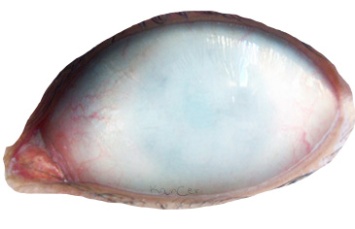
The basic idea is you take photo reference of a whited out eye. If you need to create one the best way to do this is take a few photos of your eye. The idea is to get as much of the whites of your eyes as possible. To do this take one photo looking as far left as you can. Then take another looking as far right as you can. You can also do looking up and down as well. You then use an image editing package to cut out the areas of the eye that are white and combine them so that appears to be one white eye. Like this
The next bit you will have to do is to track your footage. I’ve explained tracking in one of my earlier posts http://22dayslater.com/2014/01/09/behind-the-scenes-of-episode-2-part-2/ But to sum up tracking is a technique where by you tell the computer to track a point on the image. Once the point or points have been tracked you can use this information on another piece of footage or image and it will mimic the movement from source.
When tracking you have to make sure you track an area near the eye but it’s likely that you won’t be able to track the eye itself as people either move their eyes or blink which will throw the track off. The brow or the nose is usually a good place to track or the cheeks if they’re not talking.
I would grab a still from the footage that I’m replacing and load it into photoshop. Then adding a new layer I would place my white eyes over the originals and colour correct them to match the lighting as shown here
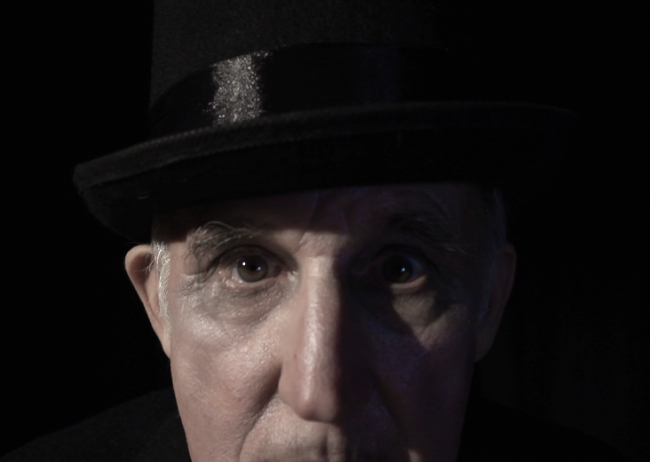
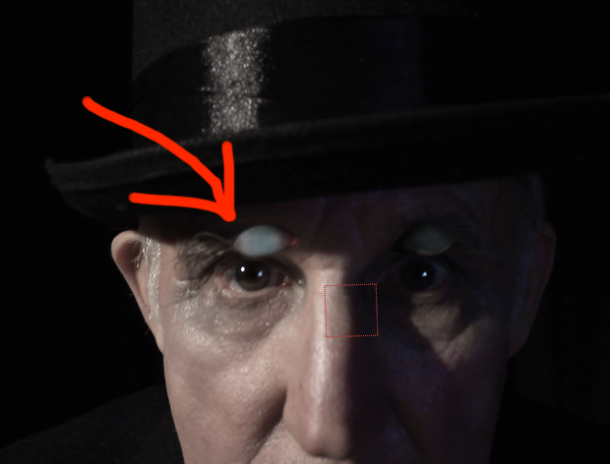
I would then overlay this comped still image over the matching frame in After Effects. Using the masking tools I could cut out just the eyes. If I was to then scrub through the timeline I’d get a problem of the eyes getting left behind, like the example below.
This is where the tracking information comes into use. If you look at the image above you should also notice a red square by his nose. This is called a Null in After Effects and I applied the tracking date I had acquired earlier to this. This now means that the Null will follow his head movement exactly. I then parented the still images of the eyes to this Null and Voila! He now has evil zombie eyes.
If you’re wondering why I didn’t just add the tracking data to the images of his eyes instead of the Null? Well I could of and it would of worked just as well. The reason I use a Null is that it gives me that extra flexibility should I need to move or rotate the eyes slightly on top of the tracked data. I sometimes find that the tracking data although good may just stray in one place or another. By having the Null contain all the Tracking data it means I can tweak the eyes without messing with that data.
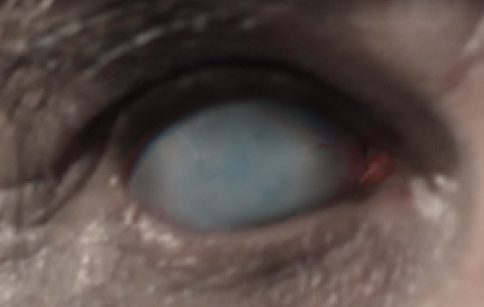
Now the trick isn’t quite finished although for some of the longer shots this would be fine, for the close ups the eyes still looked too flat. They lack all the moving reflections and specular you get off a real eye because after all we are just looking a flat image of the eye.
This was one of the reasons why I was thinking of going the 3D route. Using 3D eye replacement would mean I could get the computer to do all the clever stuff with the reflections, refractions, sub subsuface scattering. But I realised I really didn’t need it. If I just added some simple specular highlights it was enough to sell the illusion.
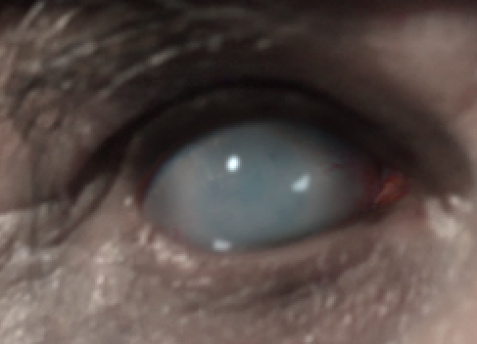
So all I did was to look at the original highlights in his eyes and add some simple colours that matched the shapes of those original highlights.
By then keying them to match the position and shape of the original highlights I could give the illusion that his eyes were moving. It even made them look wet and slightly translucent. It’s amazing how some simple highlights can make things look real.
I did this same technique for the shot where Katie looks across the hall to where Laura has just run.
One final technique I used to really sell the look was on the shadow that fall across his left eye. The still image of his eye was colour corrected to match the original plate while that eye was in shadow. But the problem was that as he tilted his head up that eye then had light case upon it as you can see in the image below
So to create this same look over the fake white eye I simply added a negative mask that matched the movement and shape of this light shaft that would cut into the image of his eye to reveal a brighter version underneath.
So I hope this has been some help and if there’s anything else you’d like to know just drop me a mail or comment below.
Next time I’ll be looking at how I achieved some of the rabbit effects.
See ya soon!
Peter


Very nice tut. Than.
No Problem Castellio, glad you enjoyed. I’ll be posting up a lot more over the coming weeks so stay tuned.
Pingback: Ouch…not really | 22 Days Later!